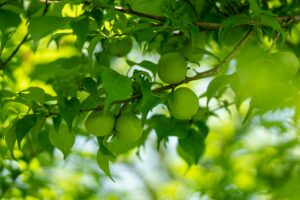

The summer heat has finally faded, and a refreshing chill now marks our mornings and evenings.
The other day, a friend living in Yamagata sent me a whole box of splendid astringent persimmons (shibugaki). Taking advantage of a morning off from work, I decided to try my hand at making hoshigaki (dried persimmons)—a cherished traditional Japanese autumn craft.
The Many Wonders of Persimmons
Persimmon trees are a familiar sight throughout Japan. In fact, right behind my house, several trees grow in the adjacent field, and around this time of year, many ripe persimmons have already fallen to the ground.
Curious to learn more about this familiar fruit, I turned to the book Kakizukushi (All About Persimmons) by Sadahiro Hamasaki.
Beyond enjoying them dried, persimmons can be turned into jam or vinegar (kakisu), or eaten fresh once their astringency is removed. Their uses go far beyond the fruit itself: the leaves make comforting herbal tea and are used to wrap kakinoha-zushi for preservation, while liquid extracted from crushed unripe fruit (persimmon tannin) has traditionally been used to dye fabric. Persimmons truly are a plant where nothing goes to waste.
They are also packed with health benefits. Compared to strawberries and mandarin oranges, persimmons contain remarkably high levels of vitamin C, along with plenty of potassium and dietary fiber. It is easy to see where the old Japanese saying comes from: “When persimmons turn red, doctors turn blue”—meaning people become so healthy that doctors are no longer needed.
Crafting Dried Persimmons: The First Steps
Following the instructions in Kakizukushi, I began the preparation. It takes about a month to a month and a half to finish. Here is a record of the first steps:
- Peeling the Skins
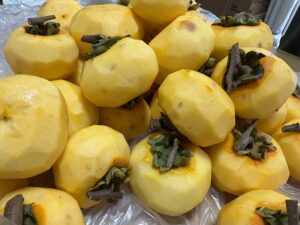
I received a total of 47 persimmons. Peeling them all carefully took about 50 minutes. Working through them in quiet focus, this was definitely the most demanding part of the process!
- Tying the Strings
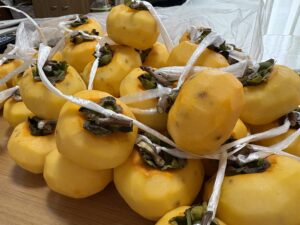
Using twine I had at home, I tied each persimmon with a single knot around the stem. My friend had harvested them specifically for making hoshigaki, thoughtfully leaving a T-shaped branch on each stem, which made tying them so much easier and truly appreciated. - Dipping in Boiling Water
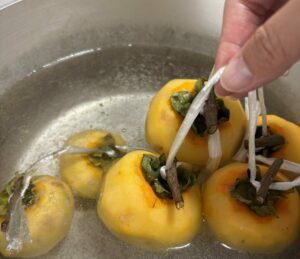
Freshly peeled persimmons hold a lot of moisture. While a food dehydrator would be convenient, I am drying mine naturally on the balcony. To prevent mold from developing, I briefly submerged each persimmon in boiling water to reduce microbial growth and prevent mold. - Hanging on the Balcony
I hung them in rows along the laundry pole on my balcony, completing the initial preparation.
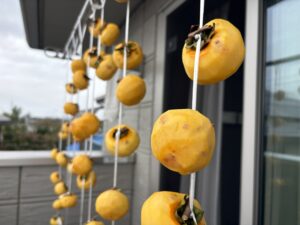
The weather in my area was unfortunately overcast that day. Ideally, the day you peel and hang them, as well as the following day, should be clear and sunny. However, I decided to leave it to nature and see how they fare.
Over the next month to month and a half, I will keep a close eye on the balcony.
Once they begin to dry, there is a step where you gently massage the fruit to help moisture escape evenly, but for now, the first phase is complete. I hope sweet, delicious hoshigaki will be ready by the time the weather turns much colder. I look forward to sharing an update on how they turn out.
References
Sadahiro Hamasaki, Kakizukushi: Shibugaki, Hoshigaki, Kakisu, Kaki Jam, Koyo Hozon (All About Persimmons: Astringent, Dried, Vinegar, Jam, and Leaf Preservation), Rural Culture Association Japan, 2016, p. 95.